Through the Years
- The Brownie
- The 126
- The 110
- Army Years - Part 1
- Army Years - Part 2
- Army Years - Part 3
- Army Years - Part 4
- Army Years - Part 5
- Army Years - Part 6
- Working in a Photofinishing Lab
- Industrial Era - Part 1
- Industrial Era - Part 2
- The 2nd Career
- Into the Fine Arts - Part 1
- Into the Fine Arts - Part 2
Photography Hardware
Processes and Projects
- Main workshop page
- Camera Building
- Pinhole camera
- Camera obscura
- Cyanotype project
- Sabattier effect
- Posterization
- Time Shifting
Photography Galleries
Photography Class Galleries
Links
The Darkroom - Part 3
The Montana Darkroom - 1992-Present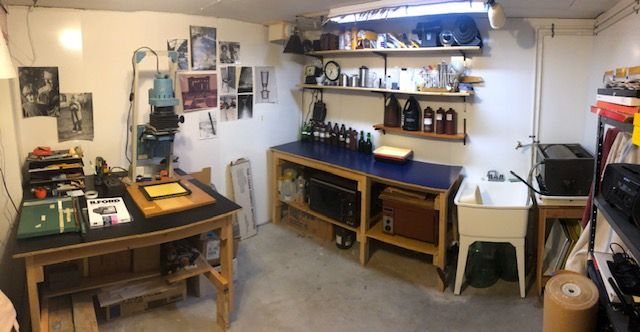
I moved to Montana in 1991 to start a job as a high school teacher. We only stayed in the first house we bought for 9 months so the darkroom didn't get set up there. Two small children, a new job, and new state kept me plenty busy and getting lost in the darkroom was just not something I had time for. Nine months later we bought the house we've been in since then. When we looked through it we were pretty amazed at the size considering that our house in California was a little less than 900 square feet and this one was over 2,600 square feet. One thing that really caught my eye was a room in the basement that had a plain concrete floor, was windowless, measured a little over 10' x 10' which would make it great darkroom.
It took a while before I got to work on setting it up. I first had to build some tables, one for the dry side and one for the wet. I ran some extention cords to deal with electrical distribution. I put up shelving. Closing the door made the room reasonbly dark. I set up my equipment and did some test runs. It seemed to work but so many other things begged for my attention that I didn't really get into production like I had in the old days. A few years later when the kids were older I took them in there and introduced them to the process. They enjoyed it but it was not going to be one of their hobbies, interests, or passions. That's OK. We have to be exposed to lots of things to find our own.
 Over the next several years I would toss out the chemicals I had mixed that has sat for way too long, mix up a new batch and play around for a few weeks or so. What got me back in there for a while were some classes I took. One was "The Physics of Photography," on online class through Montana State University in Bozeman. It was lots of fun and got me into pinhole photography and camera building, both of which are featured in greater detail in the Workshop menu on the left. I did use the darkroom for that class.
A fortuitous plumbing problem occured about this time. The drain line from the kitchen plugged up and, long story short, there was a section of pipe under the basement floor that had a hole in it and it turned out to be under the wet side table in the darkroom. I jackhammered the floor, dug down and found the pipe, cut out the offending section and, rather that just replace it with a straight piece, I added a sweep ell and a riser so I could install a sink and a drain. Since this is unvented, and not quite code, I installed a ball valve in the drain line to prevent discharges from the kitched from sucking the water out of the sink's p-trap when the room was not in use. Next, I ran hot and cold water lines in from the utility room across the hall. I now had my first home darkroom with hot and cold running water. The room was drywalled and whoever did the job knew nothing about taping. To hide that and to give the walls a more water-resistant surface, I panelled the room in white shower board. I haven't tiled the floor yet but that is on my darkroom "to do" list. I added some steel shelving and removed almost everything from the room that is not photographic. It's really a nice space now. The latest addition is that I repurposed an old safelight and enlarging timer to make a diffused light above the developer for creating the second exposure when doing the Sabbatier effect. Also on the "to do" list is to create a ventilation system. While, as a basement room, it stays comfortable all year with no heating or cooling it would benefit from some air changes.
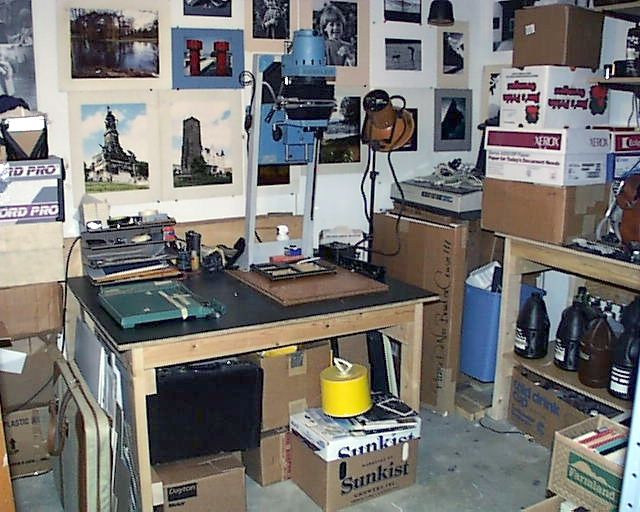
The Darkroom Equipment
This is a quick look at what I use in the darkroom. Yes, most of this stuff is over 40-years old.
|
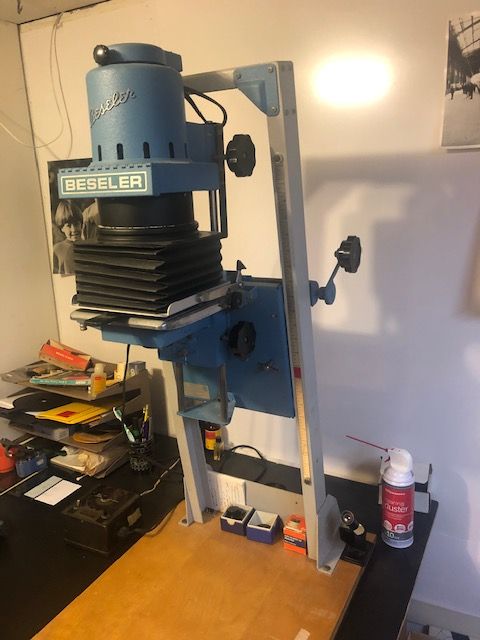
Beseler 23C enlarger. Purchased in 1976 and is as good as the day I bought it. All I have replaced is the bulb. I especially like the way the whole enlarger can rotate to a horizontal position for doing a wall projection or, more commonly for me, to use is a part of a copy stand. |
 |
|
Easels. An 11x17 and an 8x10 4in0ne. |
 
|
|
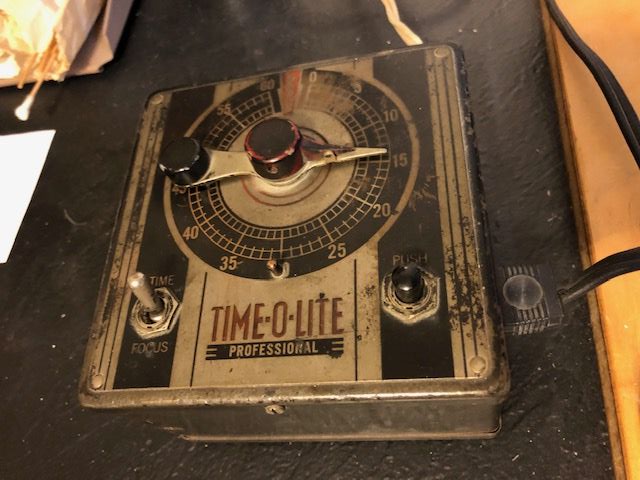
Enlarging timer. This is a very ancient Time-O-Lite that works great. |
|
|
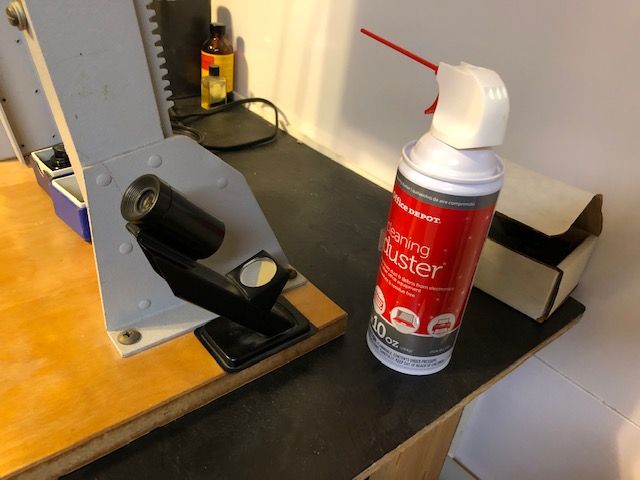
Focusing aid and canned air. |
|
|
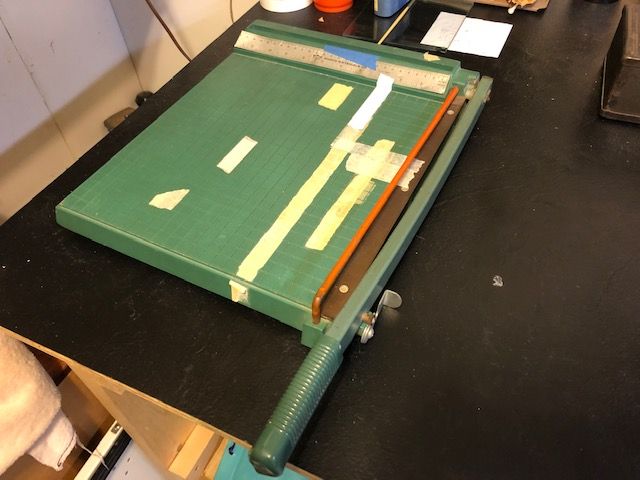
Paper cutter. |
|
|
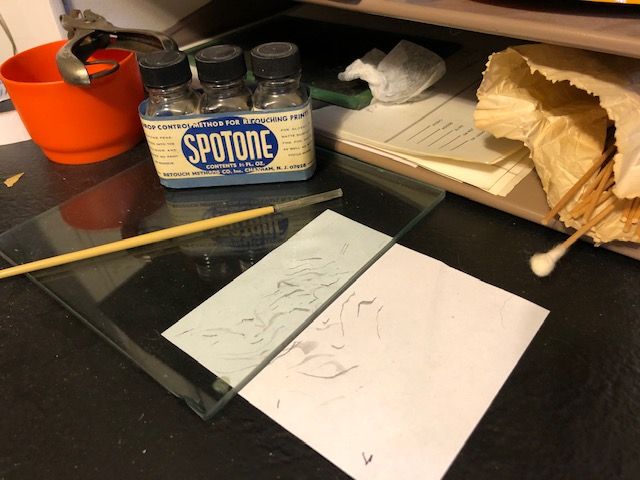
Spotting dyes, brush, and glass for spotting black and white prints. I also have a set of Marshall dyes for doing color retouching. |
|
|
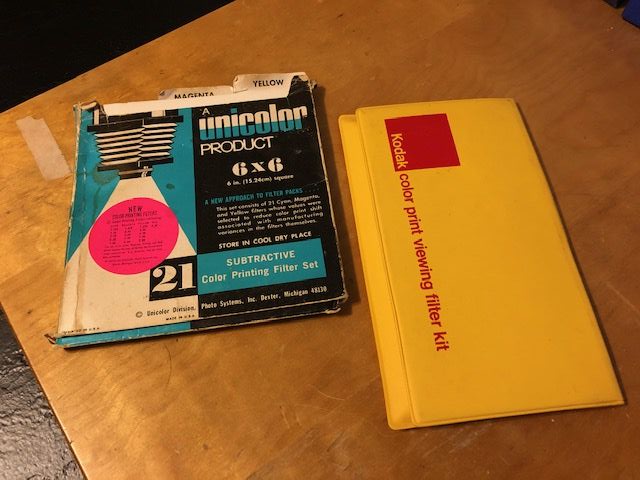
Color printing filters and a viewing kit to help iin making color corrections for color printing. I use the printing filters for adjusting contrast when using multi-grade black and white printing paper too. |
|
|
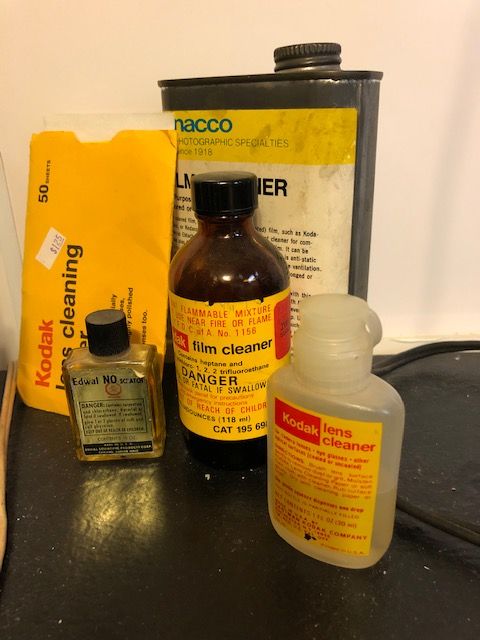
Negative cleaning, lens cleaning, scratch remover, and cleaning tissues. |
|
|
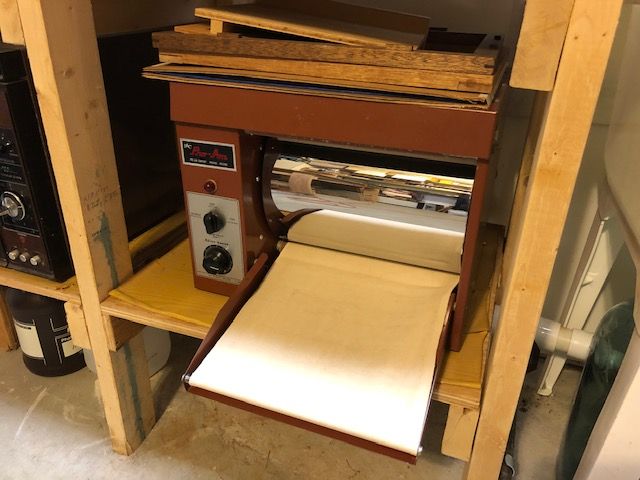
Belt and drum type print dryer. The ferrotype drum is in excellent condition. I use this when I've got a lot of fiber-based paper to dry. I got this in a barter. |
|
|
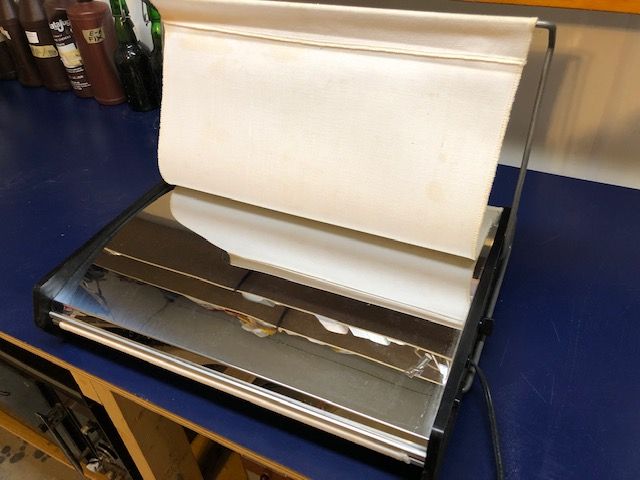
Double-sided platen-type print dryer. |
|
|
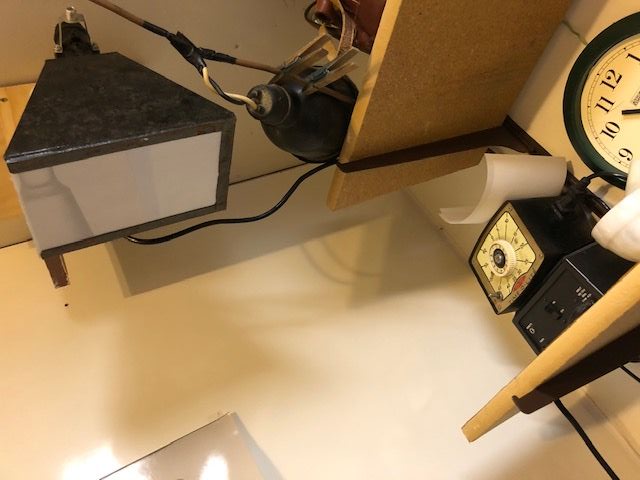
A diffused light source and timer that hangs over the development area for making Sabbatier effect prints. |
|
|
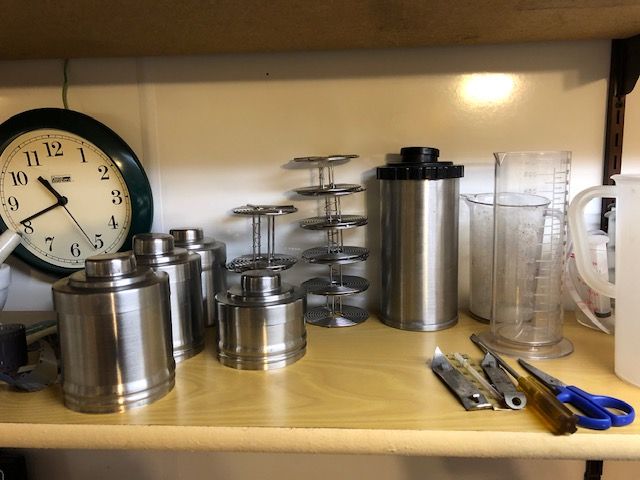
Various film developing tanks and reels and graduates for measuring. |
|
|
Film developer and a drying rack for tanks, reels, etc. Storage for squeegees, printing tongs, funnels, etc. |
|
|
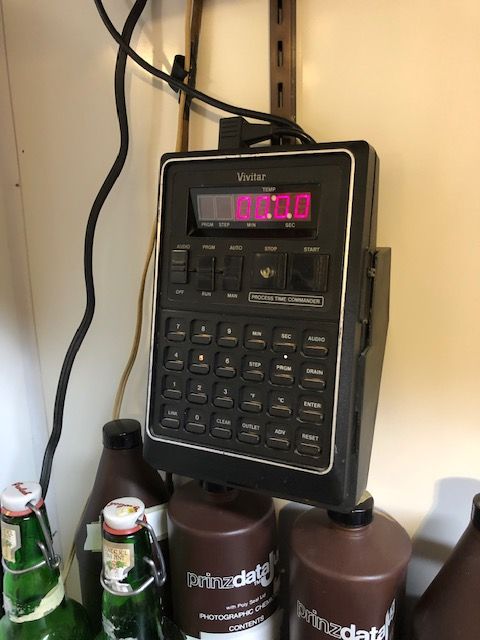
Vivitar Process Time Commander. Programmable timer that is great for timing multi-step processes. |
|
|
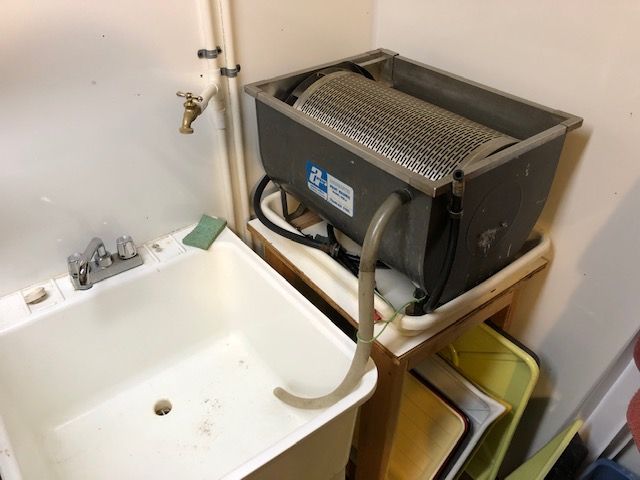
Sink and print washer. I got this print washer in a barter. I can't remember what I traded for it, probably some photographic work. It is water powered as there is a paddlewheel on the side of the drum that the incoming water pushes against. |
|
|
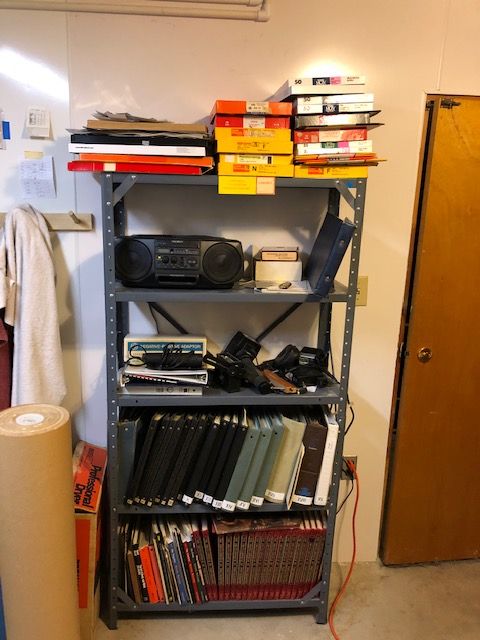
Storage for cameras, film, etc. |

|
|
Storage for negative files, printing paper, flash units, etc. |
|
|
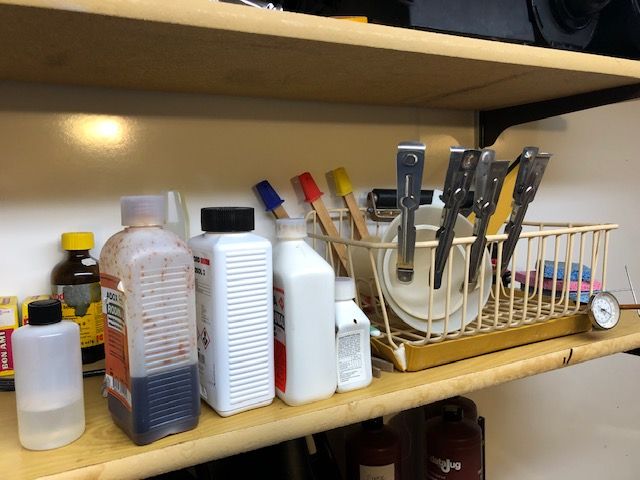
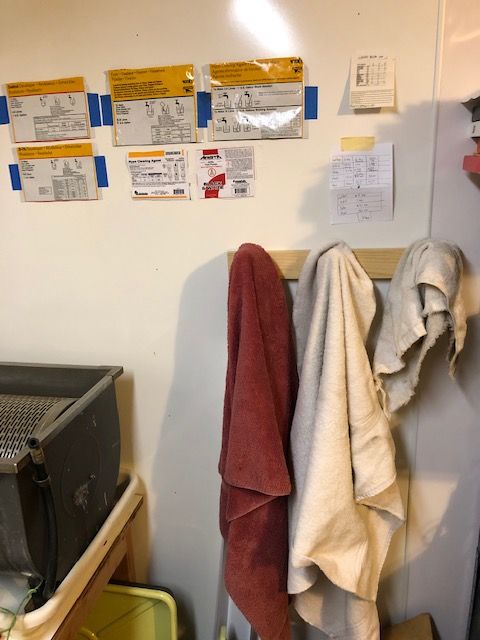
Towel rack and labels from chemicals. |
|
Click to goto to the next page: Other Photo Accessories
Click on an image to enlarge it.
Updated January 2021.